GOOGLE HANGOUTS
START A VIDEO PARTY
STEP 1: Sign in to Google+
Sign into Google +, then click the Hangouts icon. In the lower right corner of the window, there will be a link to start a video party. This is a group chat for up to ten people, allowing users to connect through video and text, share YouTube videos, and collaborate on documents.

STEP 2: Invite participants
Once you click "start a party" a new window will open for you to post a Hangout party invitation. Add people to your invite list and enter a description where it says "What's on your mind?" that will be sent to the people you invite.

STEP 3: Start chatting
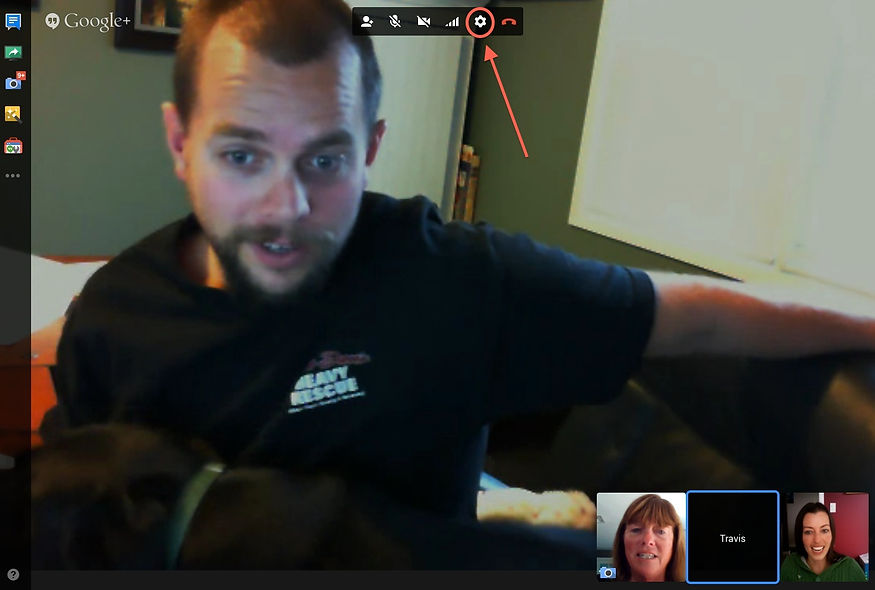
If your webcam is configured correctly then you can start chatting immediately. Users will be displayed along the bottom pane of the Hangout window. Hangouts recognizes who is currently speaking, and displays that person's image in the large window. If you want to view a participant in the large window and they are not currently speaking, click on their image at the bottom of the page. To reset back to the default view of the person speaking, click the image at the bottom of the page that is outlined with a blue square.

STEP 4: Mute your microphone or camera
If you need to mute your microphone, click the microphone button at the top of the window. If the button is red, it means your microphone is muted and other Hangout participants will not be able to hear you. To turn the microphone back on, simply click the button again. To mute your camera, click the video camera button at the top of the screen and the icon will turn red. If your camera is muted, other Hangout participants will no longer see you. To turn the webcam back on, simply click the video camera button again.

STEP 5: Adjust your bandwidth settings
If the video appears overly choppy, lower your bandwidth settings by clicking the button that looks like four signal bars in the menu at the top of the window. This will open a slider where you can adjust the quality of the Hangout. Lowering the slider will lower the quality of the video. If you lower the slider all the way to the left, it will make your Hangout audio only for you. This means that you will be able to hear other Hangout partipants, but you will not see them. Other Hangout members will hear you but they will not be able to see you and they will continue to both hear and see one another.

STEP 6: Adjust your camera and microphone settings
If your computer has more than one camera or microphone attached, you can choose which ones you would like to use. To do this, click the Gear icon at the top of the window. A new window will appear with a small image of your webcam feed. Select the devices that you wish to use, and view how it will appear. You can also click "Play test sound" to hear the sound quality with the device you have selected.
STEP 7: Add text chat
Click the chat icon at the top left of the screen and a chat box will open on the right side of your window.Type in the bottom right corner and add emoji if you like.

STEP 8: Share your screen
Hangouts can be used to share a display of your screen. This can be particularly useful if you are trying to troubleshoot a program with someone, or if you want to share something in another program with everyone in the group Hangout. To display your screen, click the Screenshare button in the left menu. A new window will open with a list of all your open windows and programs. You can share a specific window, or you can share your entire display.

STEP 9: Capture images
To take a photo of the screen, click the Capture button in the left menu. A Camera icon will appear at the bottom of the window, allowing you to take a picture of the screen when you click it. Photos taken will be viewable by all people in the Hangout.

STEP 10: Add effects
Hangouts features the ability to add headwear, eyewear, facial hair, props, sounds, and backgrounds to a user's image. To access this feature, click the Google Effects button in the left menu. The Effects menu will open on the right side of the window, replacing the Chat frame. Click the effect to make it appear on your image.

To change categories, click the arrows at the top of the Effects window. To remove all effects, click "x Remove all effects" near the bottom right corner.

STEP 11: Access Hangout Toolbox
Hangout Toolbox provides useful applications to improve your Hangout experience. For example, you can create a banner for the lower third portion of your screen that lets your audience know who you are and what you do. You can control the volume for each user, or mute the entire Hangout. Comment Tracker allows you to keep track of your audience's comments in both Google+ and YouTube.

STEP 12: Collaborate on documents
Adding Google Drive documents to your Hangout allows all members to work on the same document. To open Google Drive from Hangouts, hover your mouse over the "..." button on the left menu, then click "+ Add apps". Scroll down the list of available apps until you see "Google Drive". Hover over the "Google Drive" icon, then click "Add to video call". Now the Google Drive icon will appear on the left menu. You can add files stored in your Google Docs, or upload new files from your computer.

STEP 13: Add other apps
To add other apps, once again hover your mouse over the "..." button on the left menu, then click "+ Add apps". Scroll down the list of available apps and select any that you think may be useful. New apps will appear in the menu bar on the left.

STEP 14: Leave the Hangout
When you are finished conversing, click the red phone button at the top of the window.

Now, proceed to the next page to learn how to broadcast your Hangout.
